The beam that was "already approved": a screen porch to sunroom conversion, reviewed remotely
October 22, 2026 · Enrique Lairet, PE
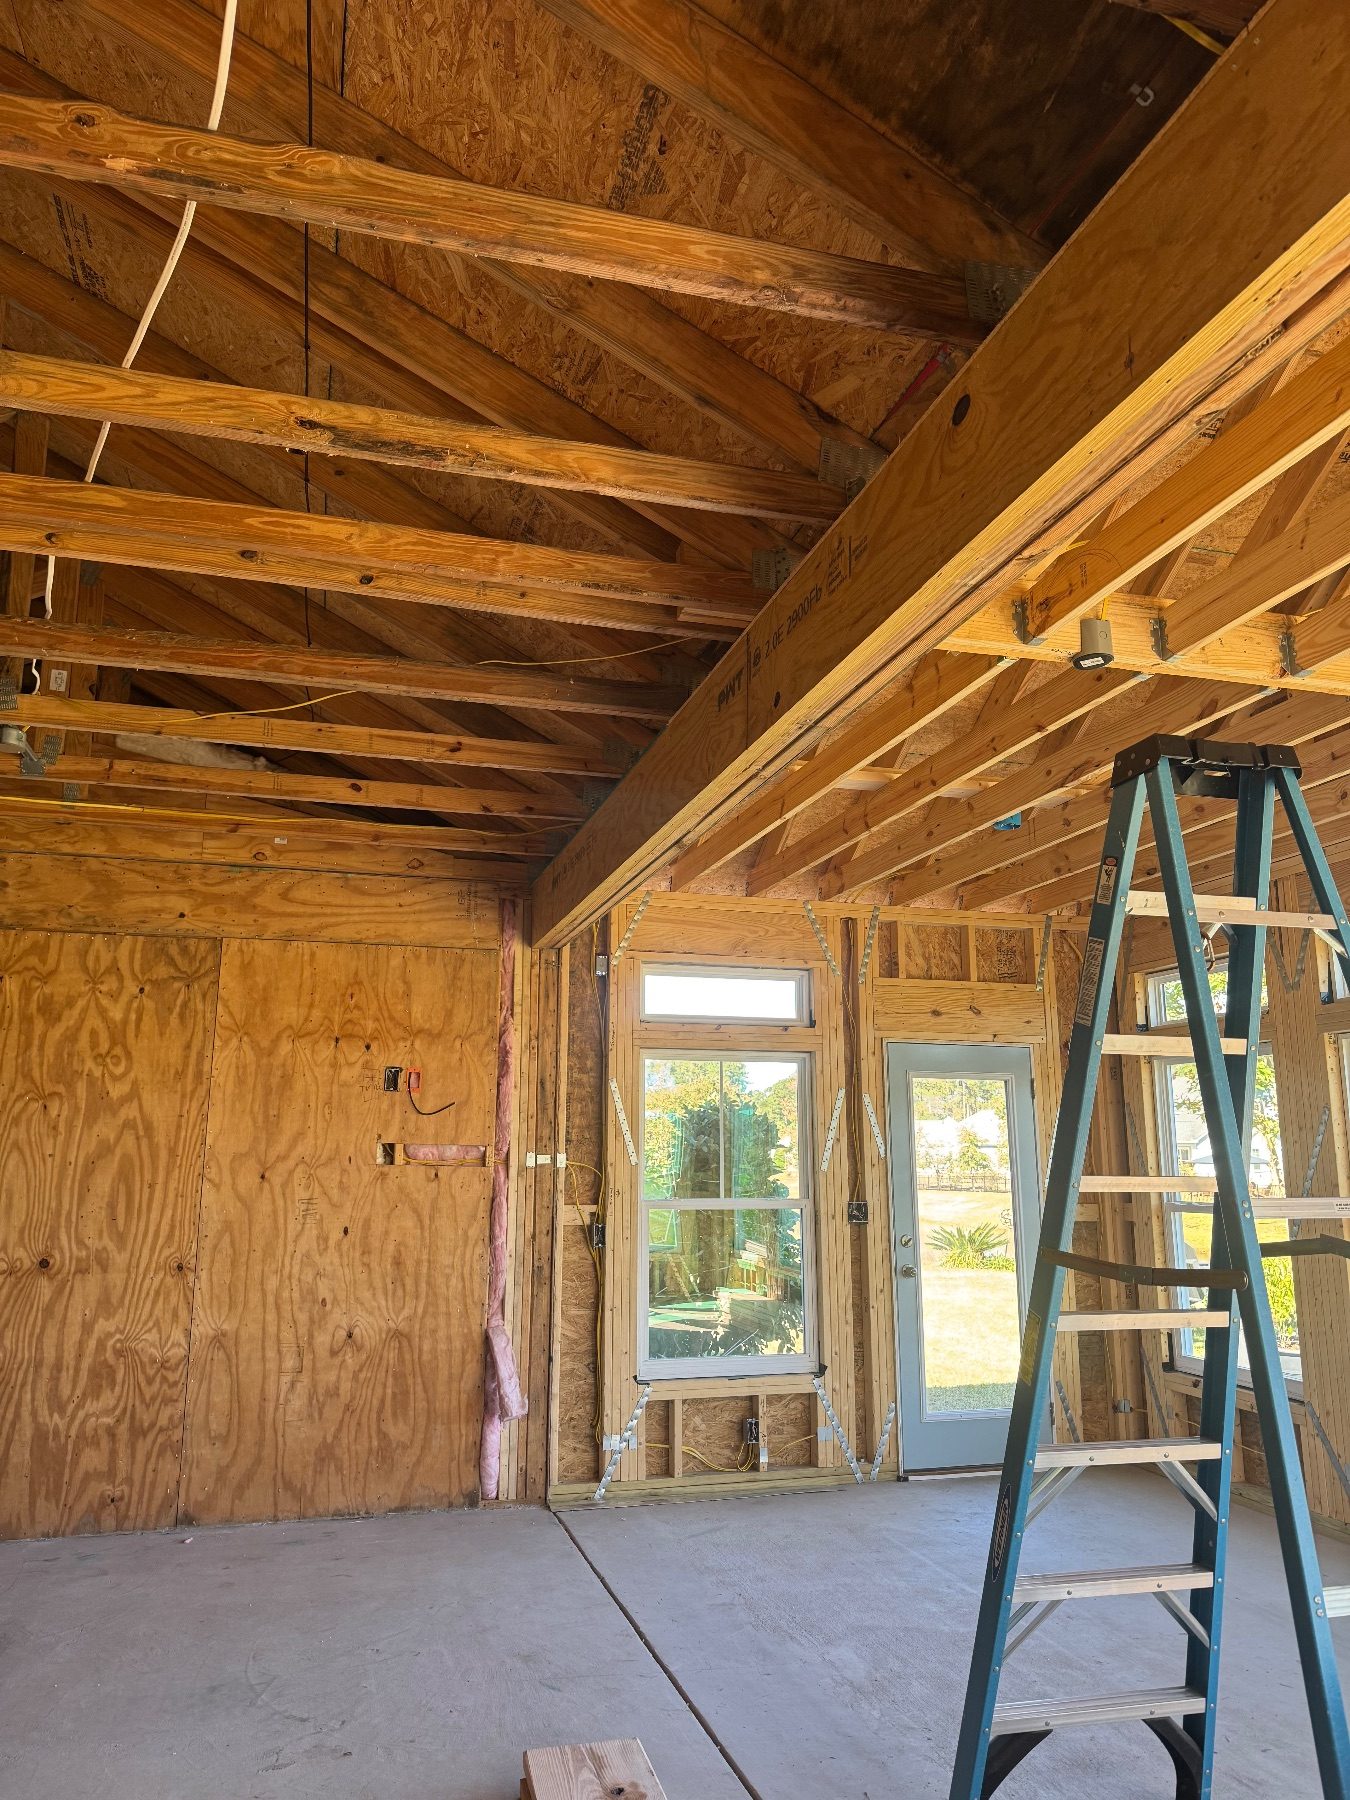
A contractor in coastal North Carolina was turning the covered rear porch of a production-built home a few years old into a conditioned sunroom. The framing inspector walked it, said the work looked fine, and asked for one thing before he would pass it: an engineer's letter for the permit on "the beam with the post support." The contractor called us expecting a quick structural engineer letter for the inspector. What he got was four days of photo requests, a beam that did not check under code loads as we found it, and a repair that cost about $600 in material. This is how that went, with the names, the address and the permit left out.
What the inspector was actually asking for
"The inspector accepted it" and "it passed" sound like the same thing. They are not. An inspector checks what he can see and measure against the code book; sizing a beam is not something the code asks him to do from a ladder, and he knows it. When he asks for an engineer's letter for a permit, he is saying the opposite of "this is fine": he is saying this is the one piece he cannot verify, so someone with a seal has to. The contractor was not wrong to expect a fast answer, because most of the time the beam is fine and the letter takes an afternoon. We just do not know which time it is until we look.
The beam in question ran the full width of the room, about 21 feet, with no posts between the ends. The original porch roof trusses bore directly on it. As we found it, the beam was two sawn 2x12s. For the conversion the contractor had added one 1¾" x 11⅞" LVL ply on the room side, an engineered beam made of glued wood veneers that is much stronger than sawn lumber of the same size, and figured that settled it.
A remote review is a conversation, not a form
We did the whole review without a site visit, from photos, a video walkthrough, a hand sketch, tape measurements the contractor took for us, and the county's building sketch of the house. Remote structural review works, but only one way: specific questions get specific photos, and the engineer keeps asking until the photos stop changing the story.
This story changed several times. The first description was "triple LVL." Then it was "ceiling load only, the trusses go the other way." Then "the trusses are continuous over it." None of this was anyone lying. Contractors describe the part they looked at, and each description was true of something. Our job was to ask for the next photo rather than accept the sentence.
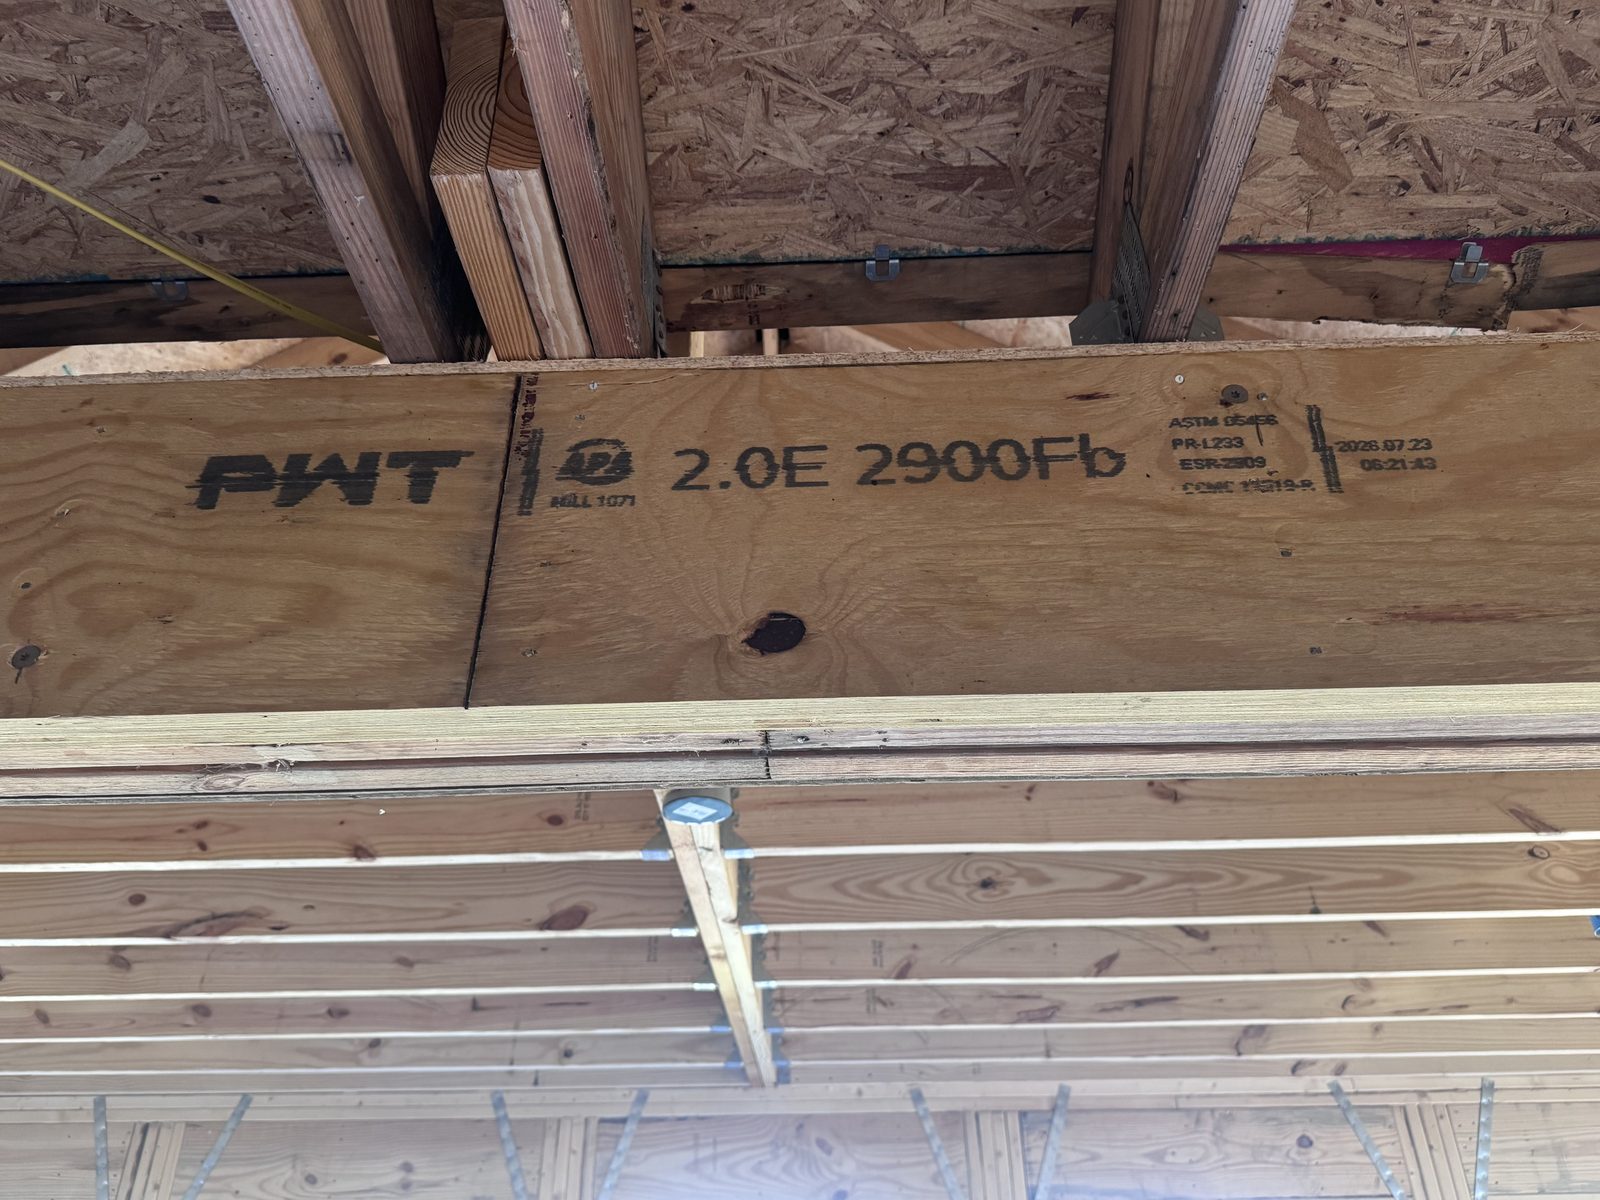
The photo that settled the make-up of the beam was a close-up of its underside. One ply showed the fine, even veneer lines of LVL; the other two showed knots and checking, the small drying cracks you get in sawn lumber. That is how you tell LVL from sawn lumber in a picture, and it meant the beam was two sawn 2x12s plus one LVL, not three LVLs. A tape run along a truss bottom chord gave us the back-span, the distance from the beam to the next support, which sets how much roof each truss drops onto the beam. The county's footprint sketch showed something the room itself did not: the house wall behind the porch was stepped, so half the beam carried trusses spanning about 7 feet and the other half carried trusses spanning about 12½ feet. One end of the beam was carrying nearly double the load of the other.
The beam, as we found it, did not check
With the real make-up and the real loads, the LVL beam sizing calculation was short and not encouraging. By our calculation, the double 2x12 on its own did not check for a 21-foot span under the code roof loads we applied, conversion or no conversion. We do not know how it was originally sized or what the roof looked like on the day the house was built, and that is not the point. The point is that a beam being original to a house is not, by itself, evidence that it works for the load it carries today.
Adding one LVL did not fix it. When plies of different stiffness share a load, the stiffer one takes more, but the sawn plies still carry their share, and that share was too much. In our calculation the sawn 2x12s came out at roughly 1.3 to 1.6 times their allowable bending stress, which is the stress the code lets that grade of lumber carry with its safety factor included. Total deflection, how much the beam sags under full load, came out around L/170 to L/250 against a limit of L/240, meaning the span divided by 240; sagging more than that cracks finishes and, on a roof, ponds water. Adding a member to a beam that does not check does not automatically make it check. It makes it a beam that checks a little less badly.
We told the contractor we could not seal it as built, explained why in the terms above, and gave him three ways out with rough costs. One more LVL was the cheapest, but marginal depending on how the roof geometry worked out. Two more LVLs, so that three LVLs carry the span on their own and the sawn plies become passengers, was our recommendation at about $600 in material. A post at mid-span on a new footing was the strongest, and also a column in the middle of the room the owner had just paid to open up. The homeowner chose two more LVLs.
Beam reinforcement is only as good as the fastening
The contractor installed the two plies and sent photos. Then we asked the question that gets skipped: how are the layers fastened to each other? The answer was 16d nails from one face. That is fine for joining two plies. Across five layers it is impossible to verify after the fact, because a nail driven from one side cannot be seen to reach the far side, and the plies only act as one beam if the load can move between them.
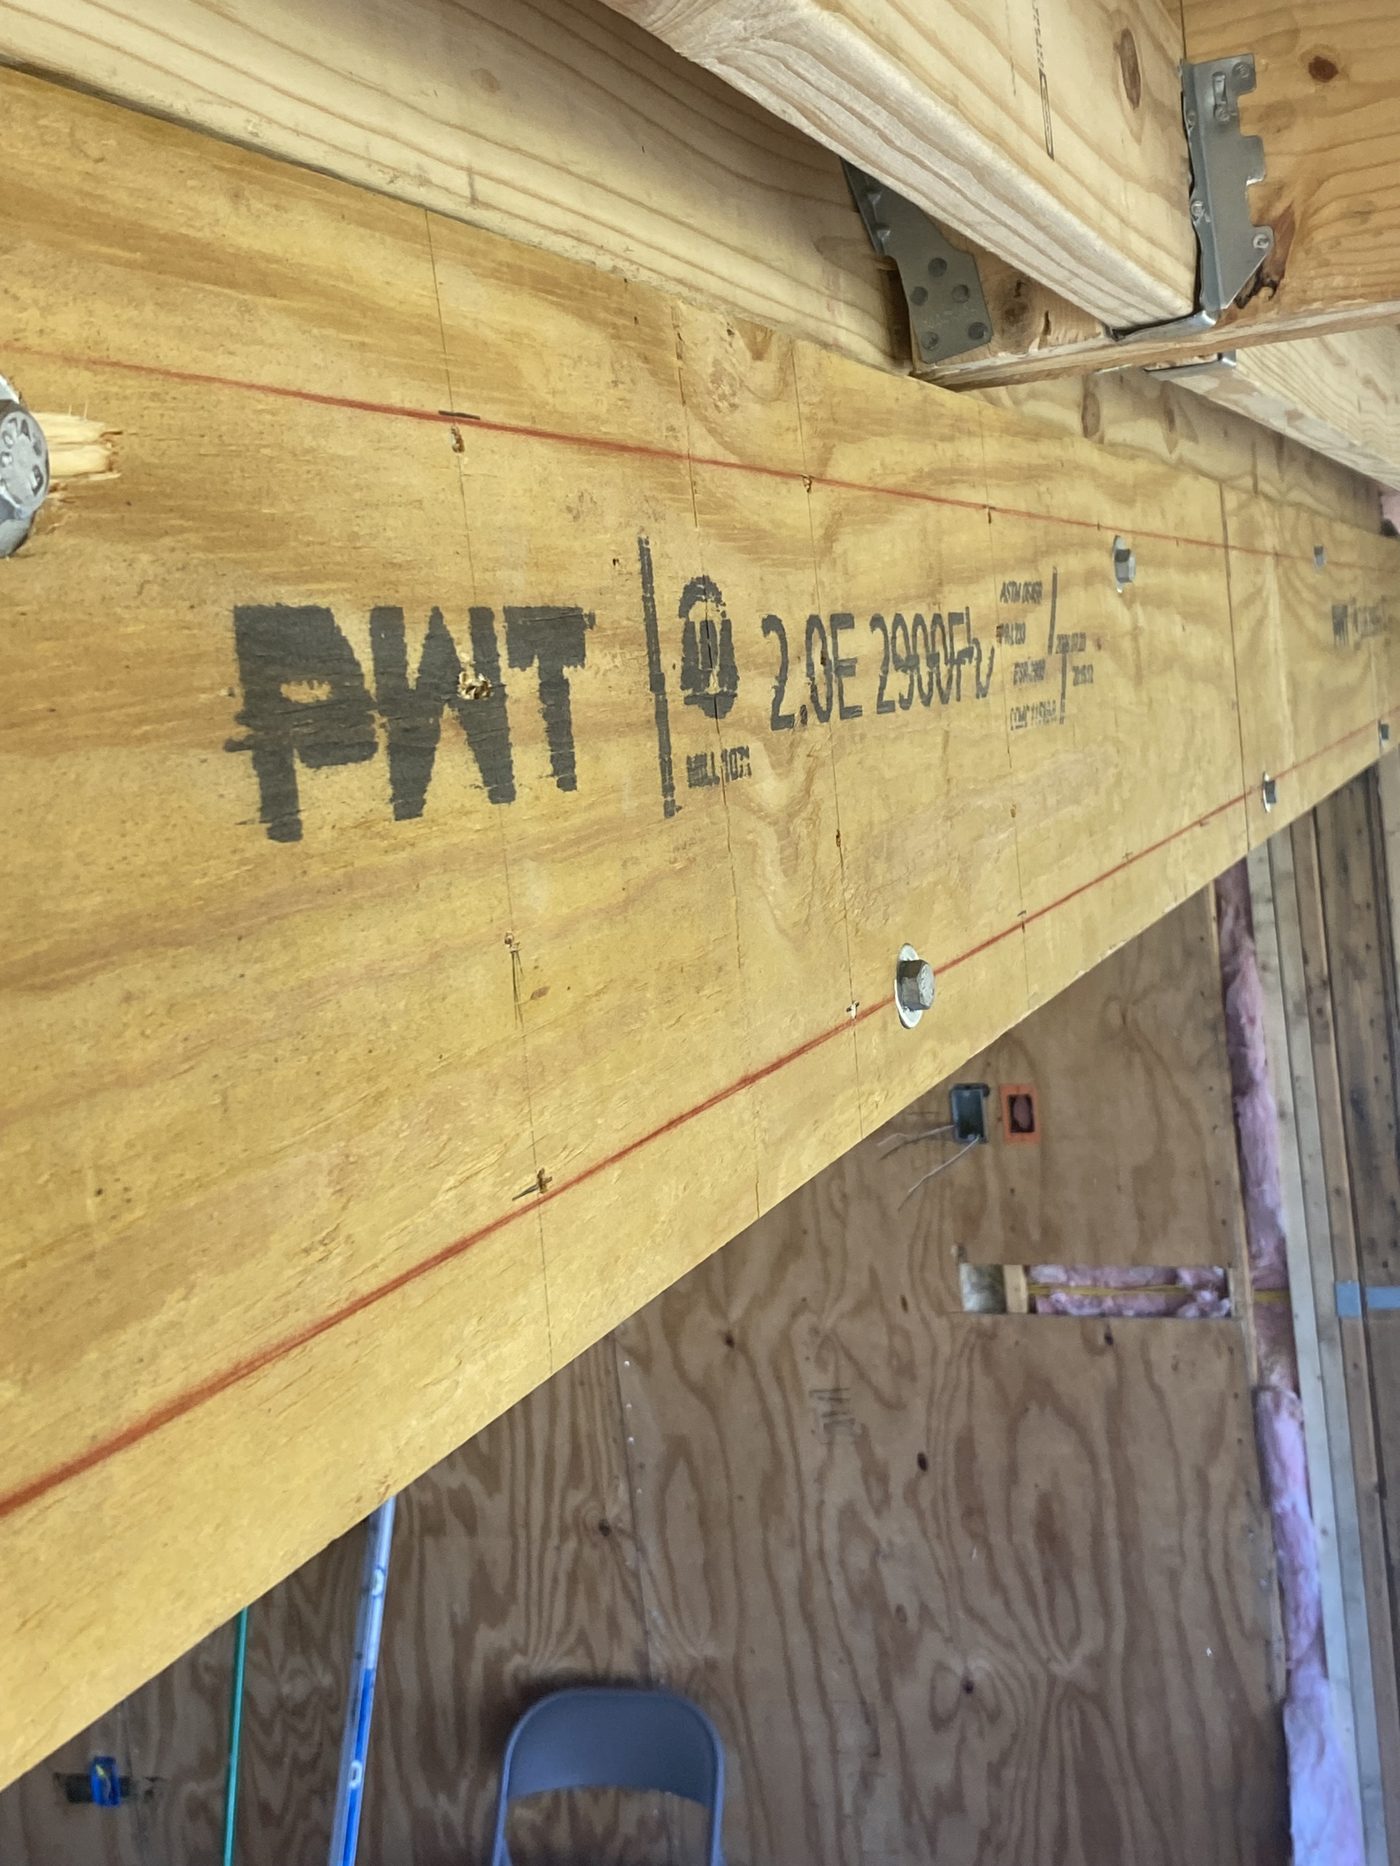
Rather than take anyone's word, we asked for ½-inch through-bolts in two staggered rows every 24 inches through the full depth of the beam. Through-bolts carry the ply-to-ply load on their own with a large margin, and they can be checked from the outside: a bolt head on one face and a washer and nut on the other means the bolt goes all the way through. He added them the next day and photographed the bolt heads, the washers, and the label on the box of nuts. Cheap insurance, verified from a photo.
What the letter said, and when
The final engineer's letter went out four days after the first contact. It covered that beam and its supports, which is what the inspector asked about, and nothing else in the conversion. It carried the calculation summary, the photos as exhibits, and a short list of conditions: the minimum post width under each end of the beam, the strap and tie specifications at the truss bearings and the post tops, and no new holes through the beam for wiring or plumbing. The inspector had what he asked for, the owner kept an open room, and nobody drove anywhere.
It cost the owner far less than a site visit plus a redesign would have, and it worked because the contractor was cooperative and answered specific questions with specific photos. The same review goes sideways when the answers are descriptions instead of pictures. If there is one thing to take from this job, it is that the beam nobody checks in a screen porch to sunroom conversion is the one that was already there, and that the fix, found early, is usually lumber and bolts rather than a column.
If you have been asked for an engineer's letter, send us the photos first and we will tell you what else we need. Most of the time the answer is quick; when it is not, you want to know before the drywall goes up.
This case is anonymized and details have been generalized. Every structure is different: nothing here is engineering advice for your project or a design for your beam, and the only way to know what yours needs is to have it reviewed.
Related

Aug 3, 2025 · Case study
Navigating Boulder's Building Codes: A Complete Engineering Guide for Your Project

Jul 8, 2025 · Case study
🏗️ Missed an Inspection? Here’s How to Fix It With an Engineering Letter — Real Talk From the Field

Jun 30, 2025 · Case study